Paper Piano
Using STM32 to Play Melody by Pencil and Paper
Category: Embedded System Development
Project Type: Group
Date: December 2018 - January 2019
Role: Coding, Building Hardware
Abstract
This is a creative project of Embedded System Development. The
project used STM32 board as the microcontroller to build a simple
piano on paper.
Material
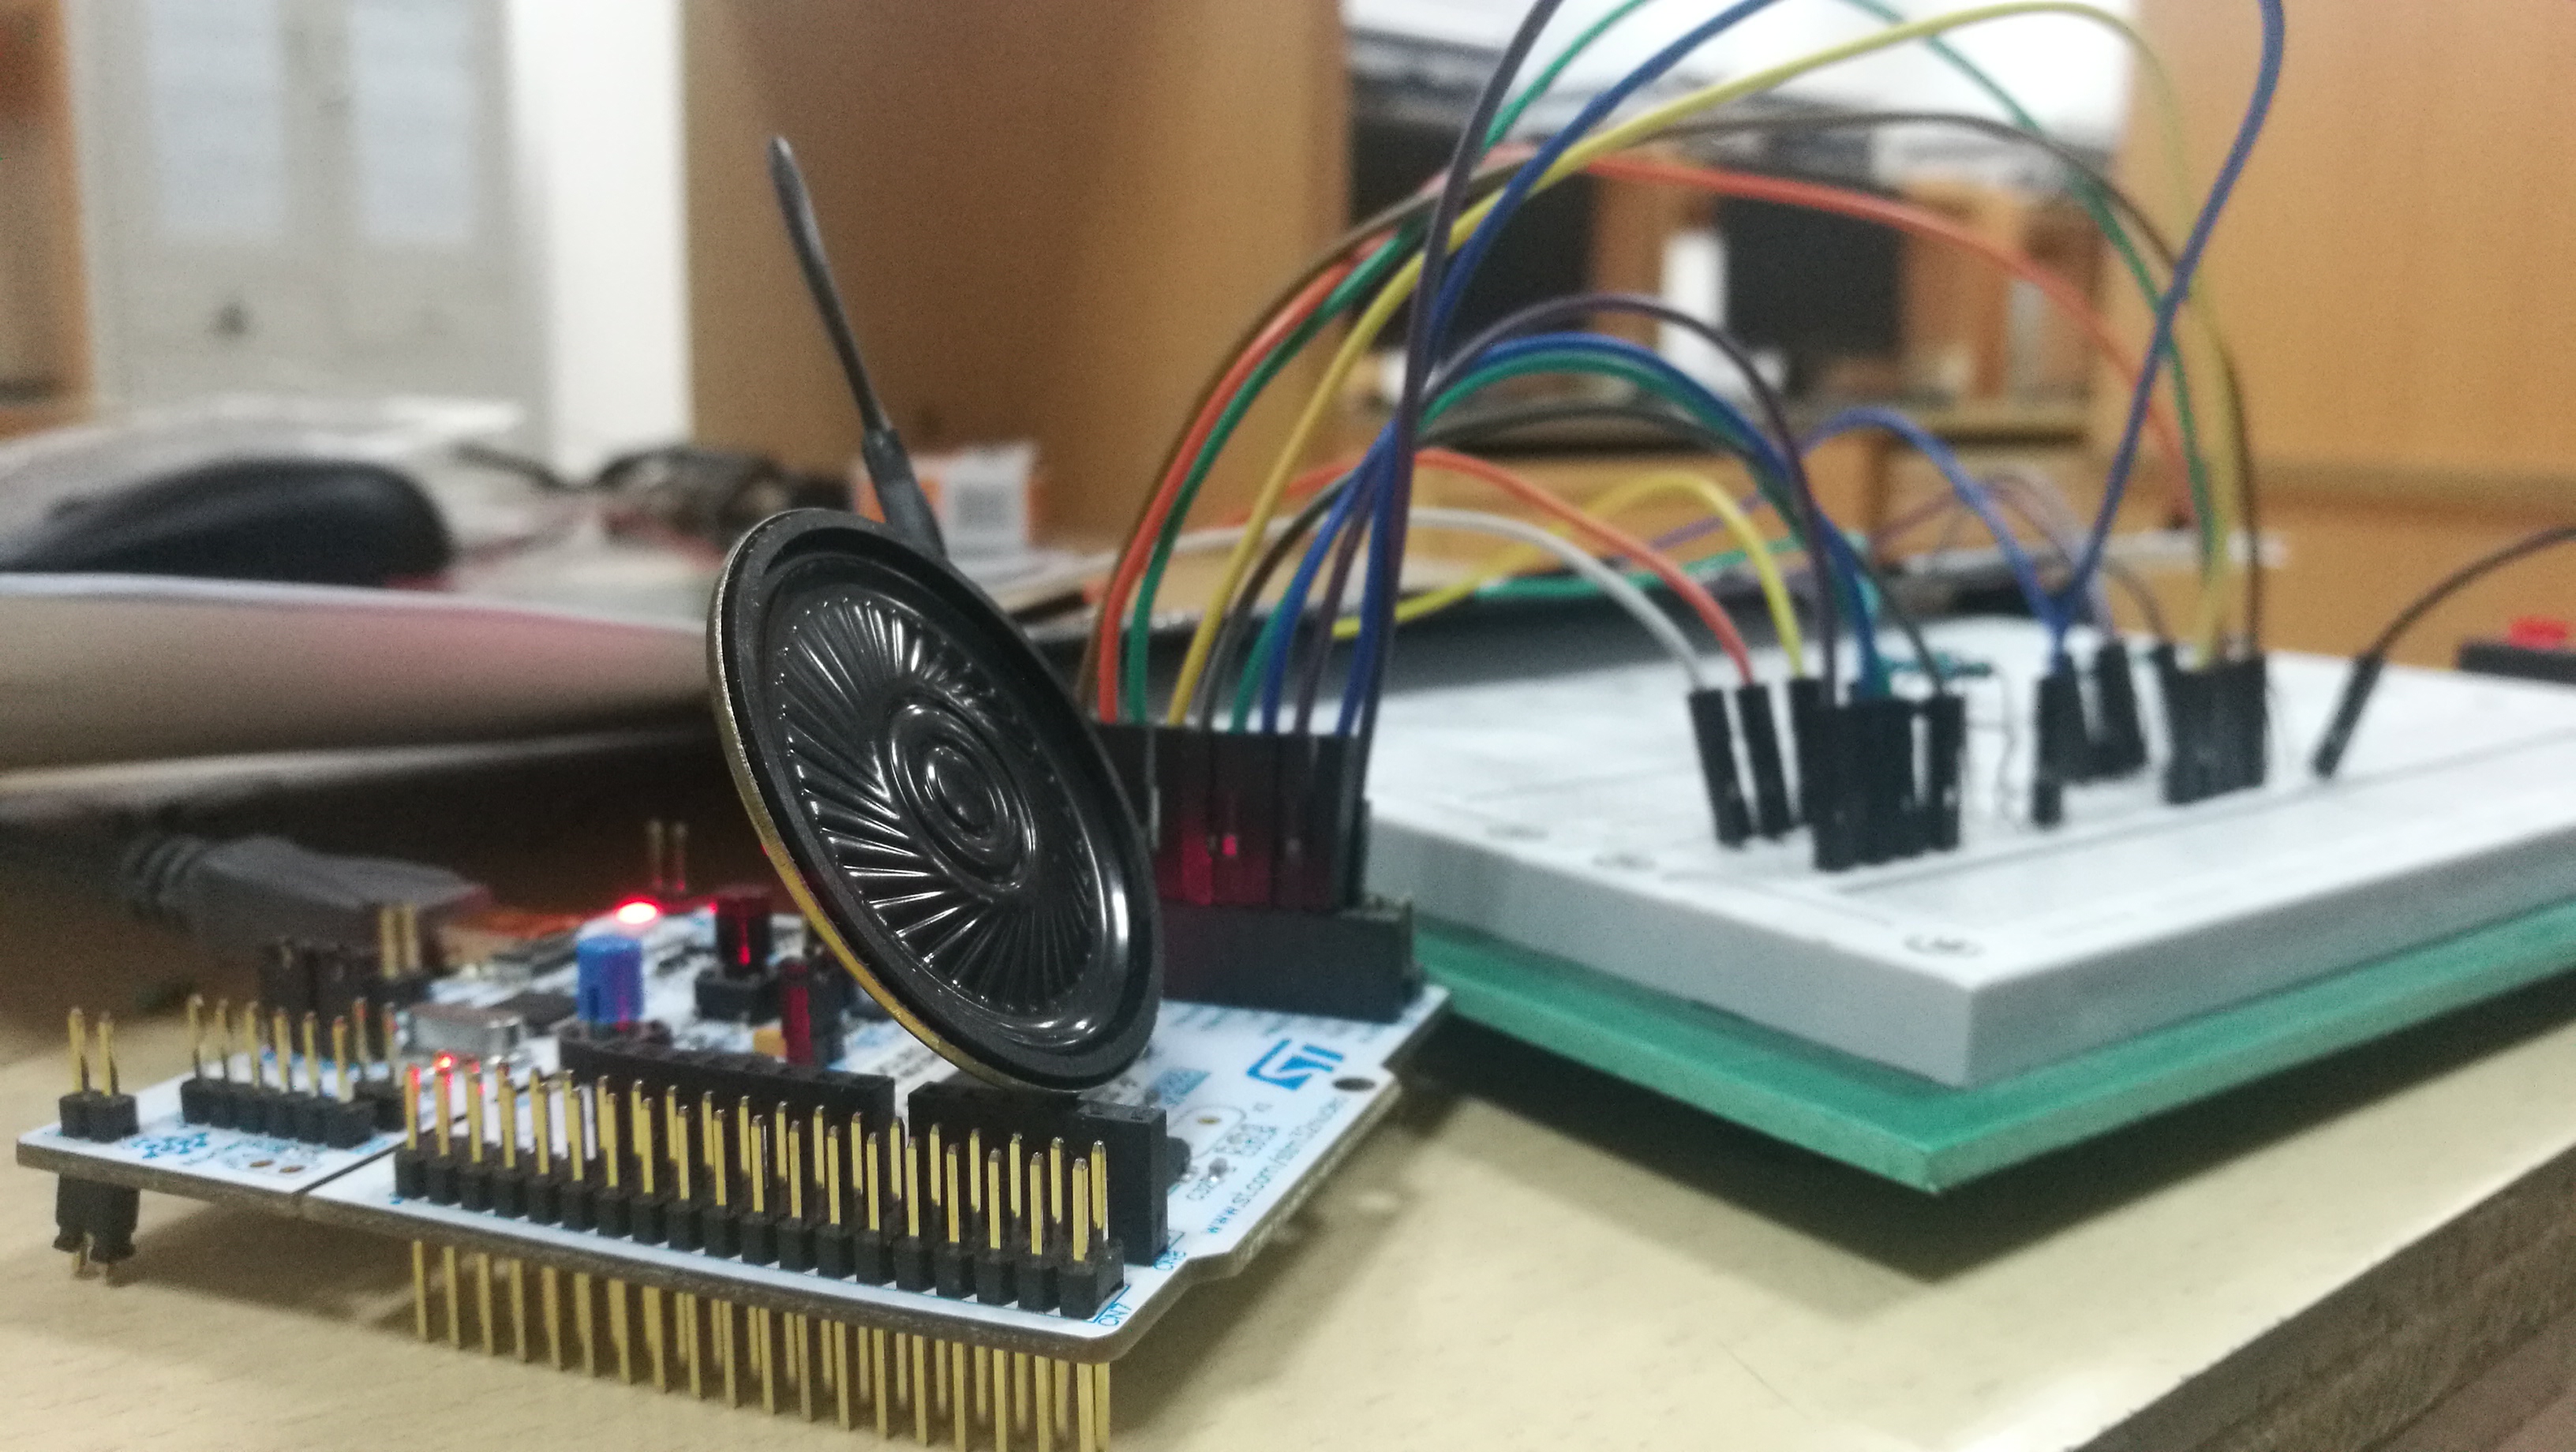
- STM32 Nucleo F401RE
- 8 * 2.2m Ohms resistors
- 1 * 8 Ohms speaker
- 1 * breadboard
- paper, pen, paper clips
- several Dupont wires
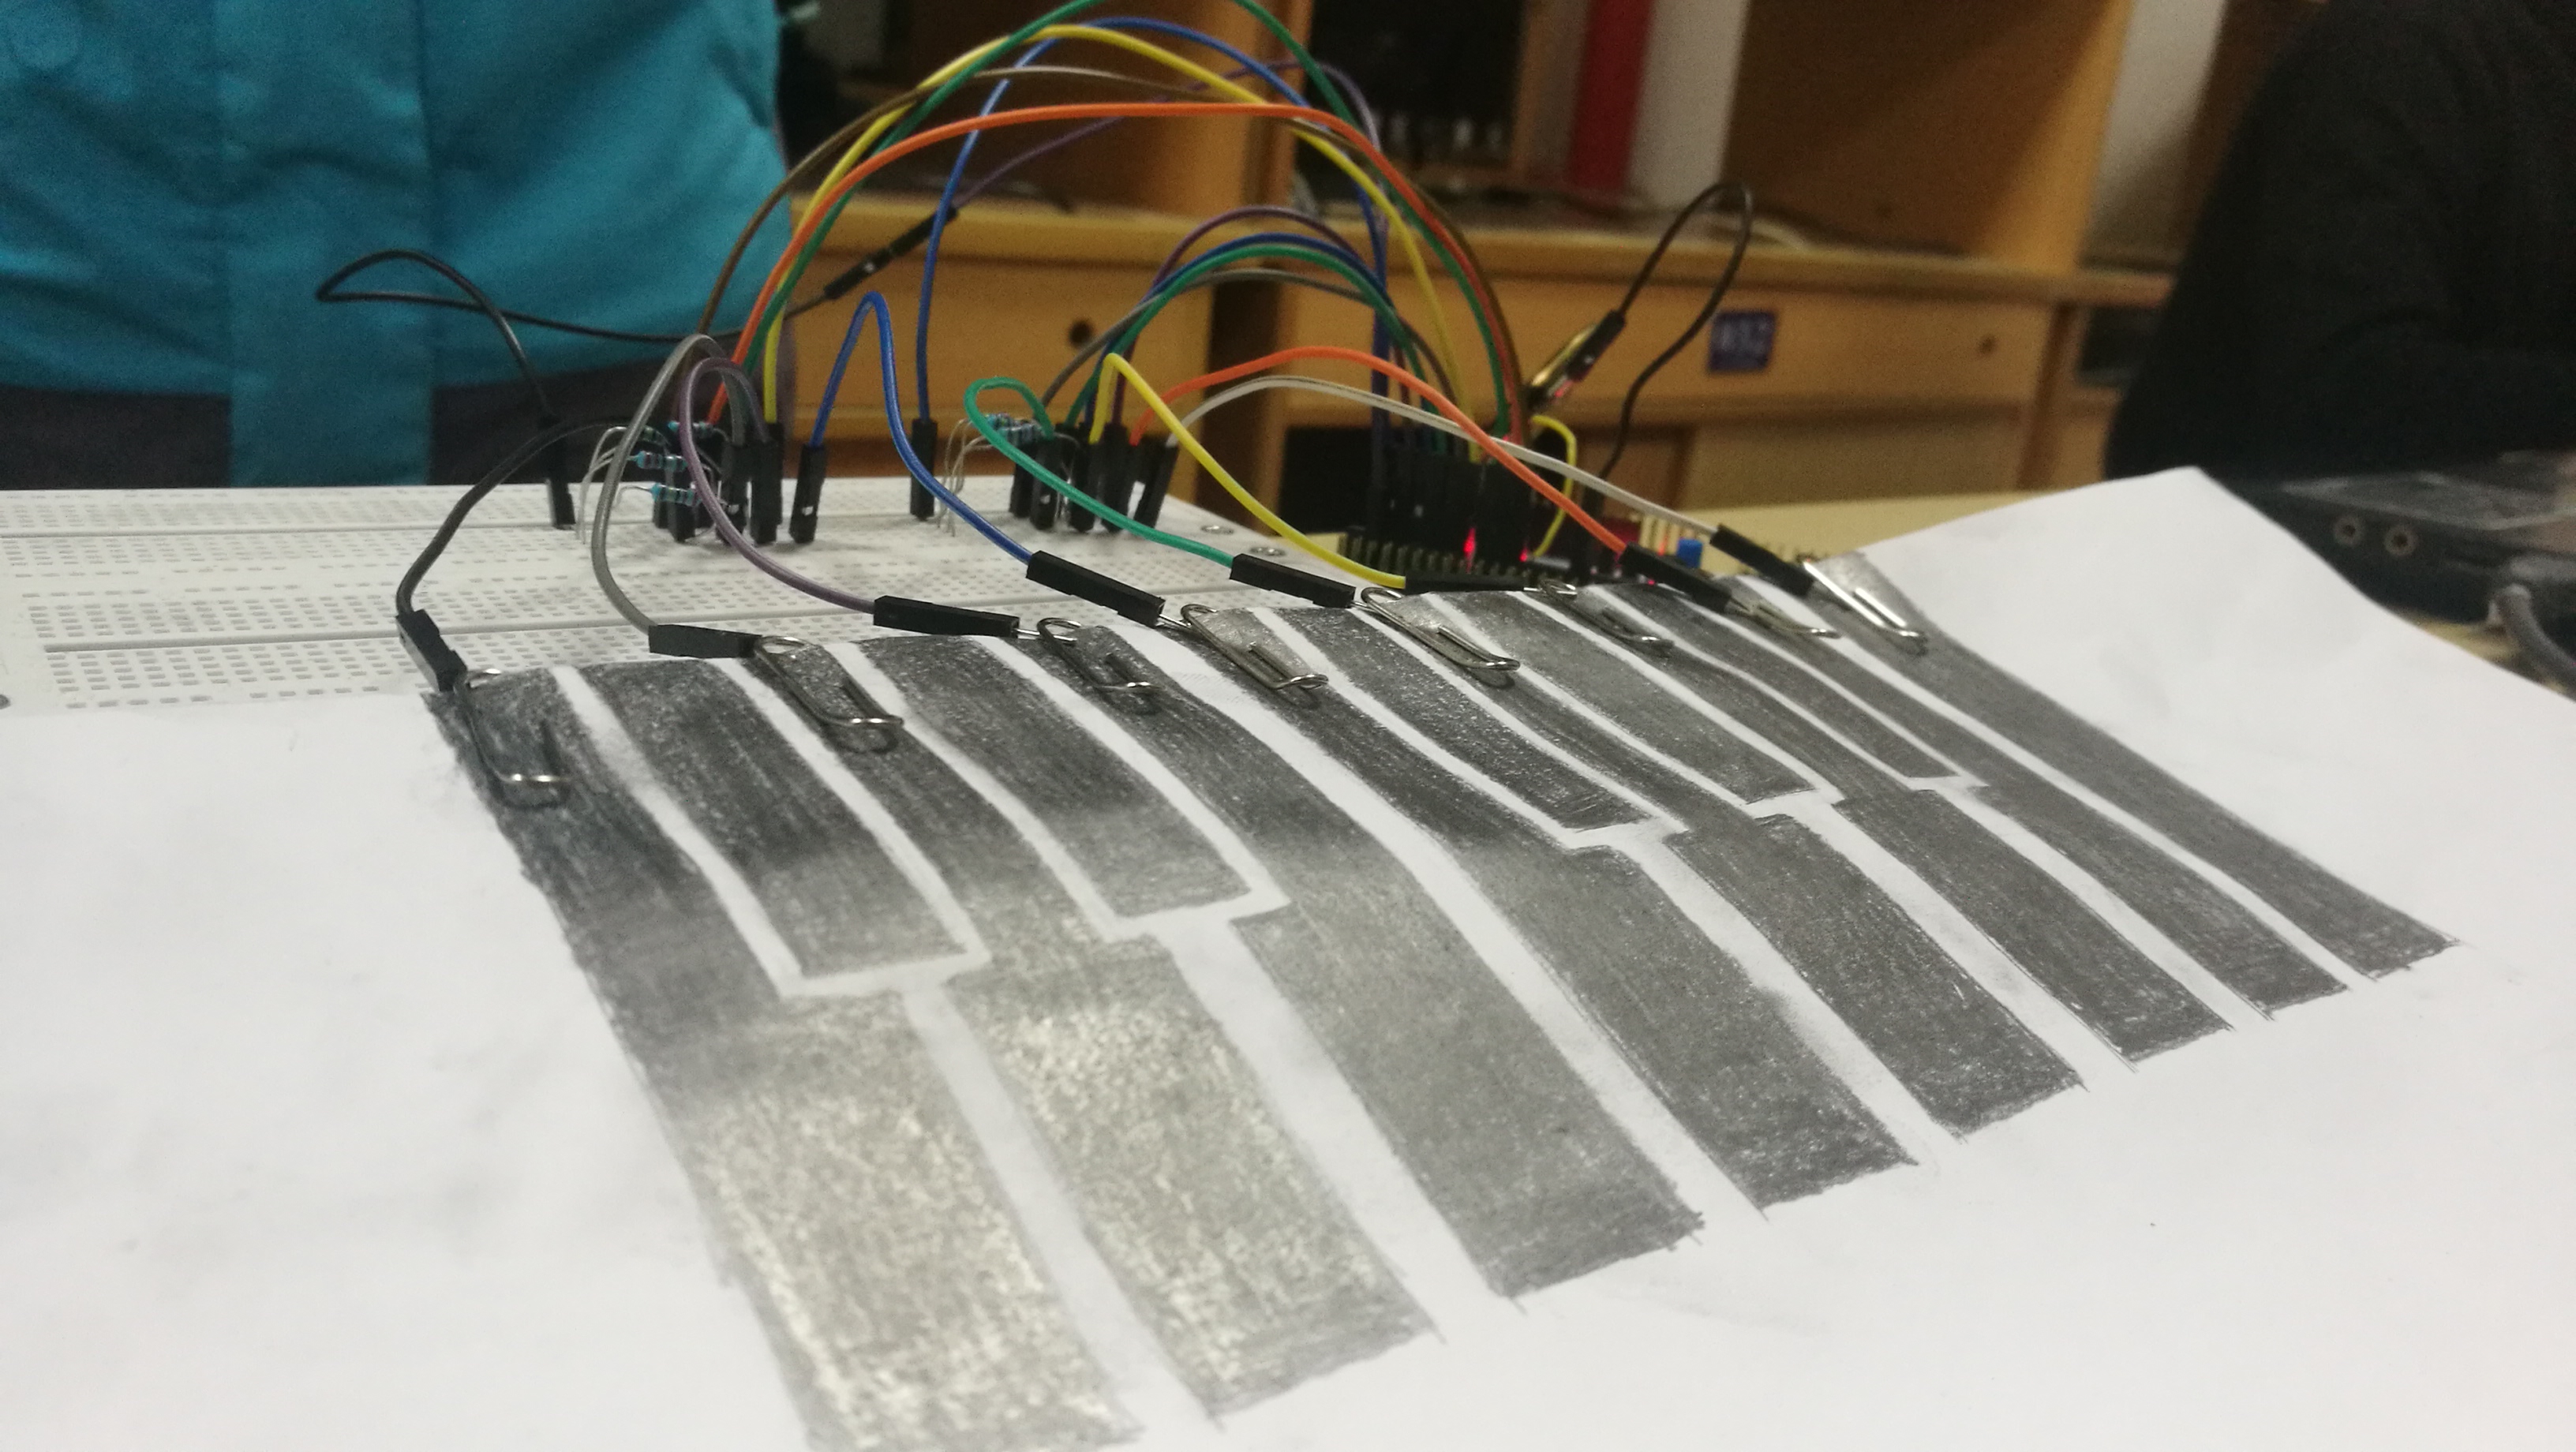
How it works
1.Capacity Sensor
In this project, two I/O pins of MCU
are used to form a capacitive touch sensor.
First of
all, the human body has a certain amount of capacitance. When two
I/O pins are connected to a conductive foil, the foil forms a basic
inductive touch area.When there is no finger contact, there is only
one capacitance
in the area. After touching with the finger, the human capacitance
is connected into the circuit. The change of the total
capacitance is as follows:
The two
pins are connected to a large resistance R (100k Ω - 50M Ω). The microcontroller uses one of them (the Send Pin) to produce square wave, measuring the charge
and discharge time constant τ = R * C of the RC circuit, then the current value
of capacitance between the pins. The other Pin is called Sensor Pin,
which is connected to the touch foil and changes the value of the
inductive capacitance.
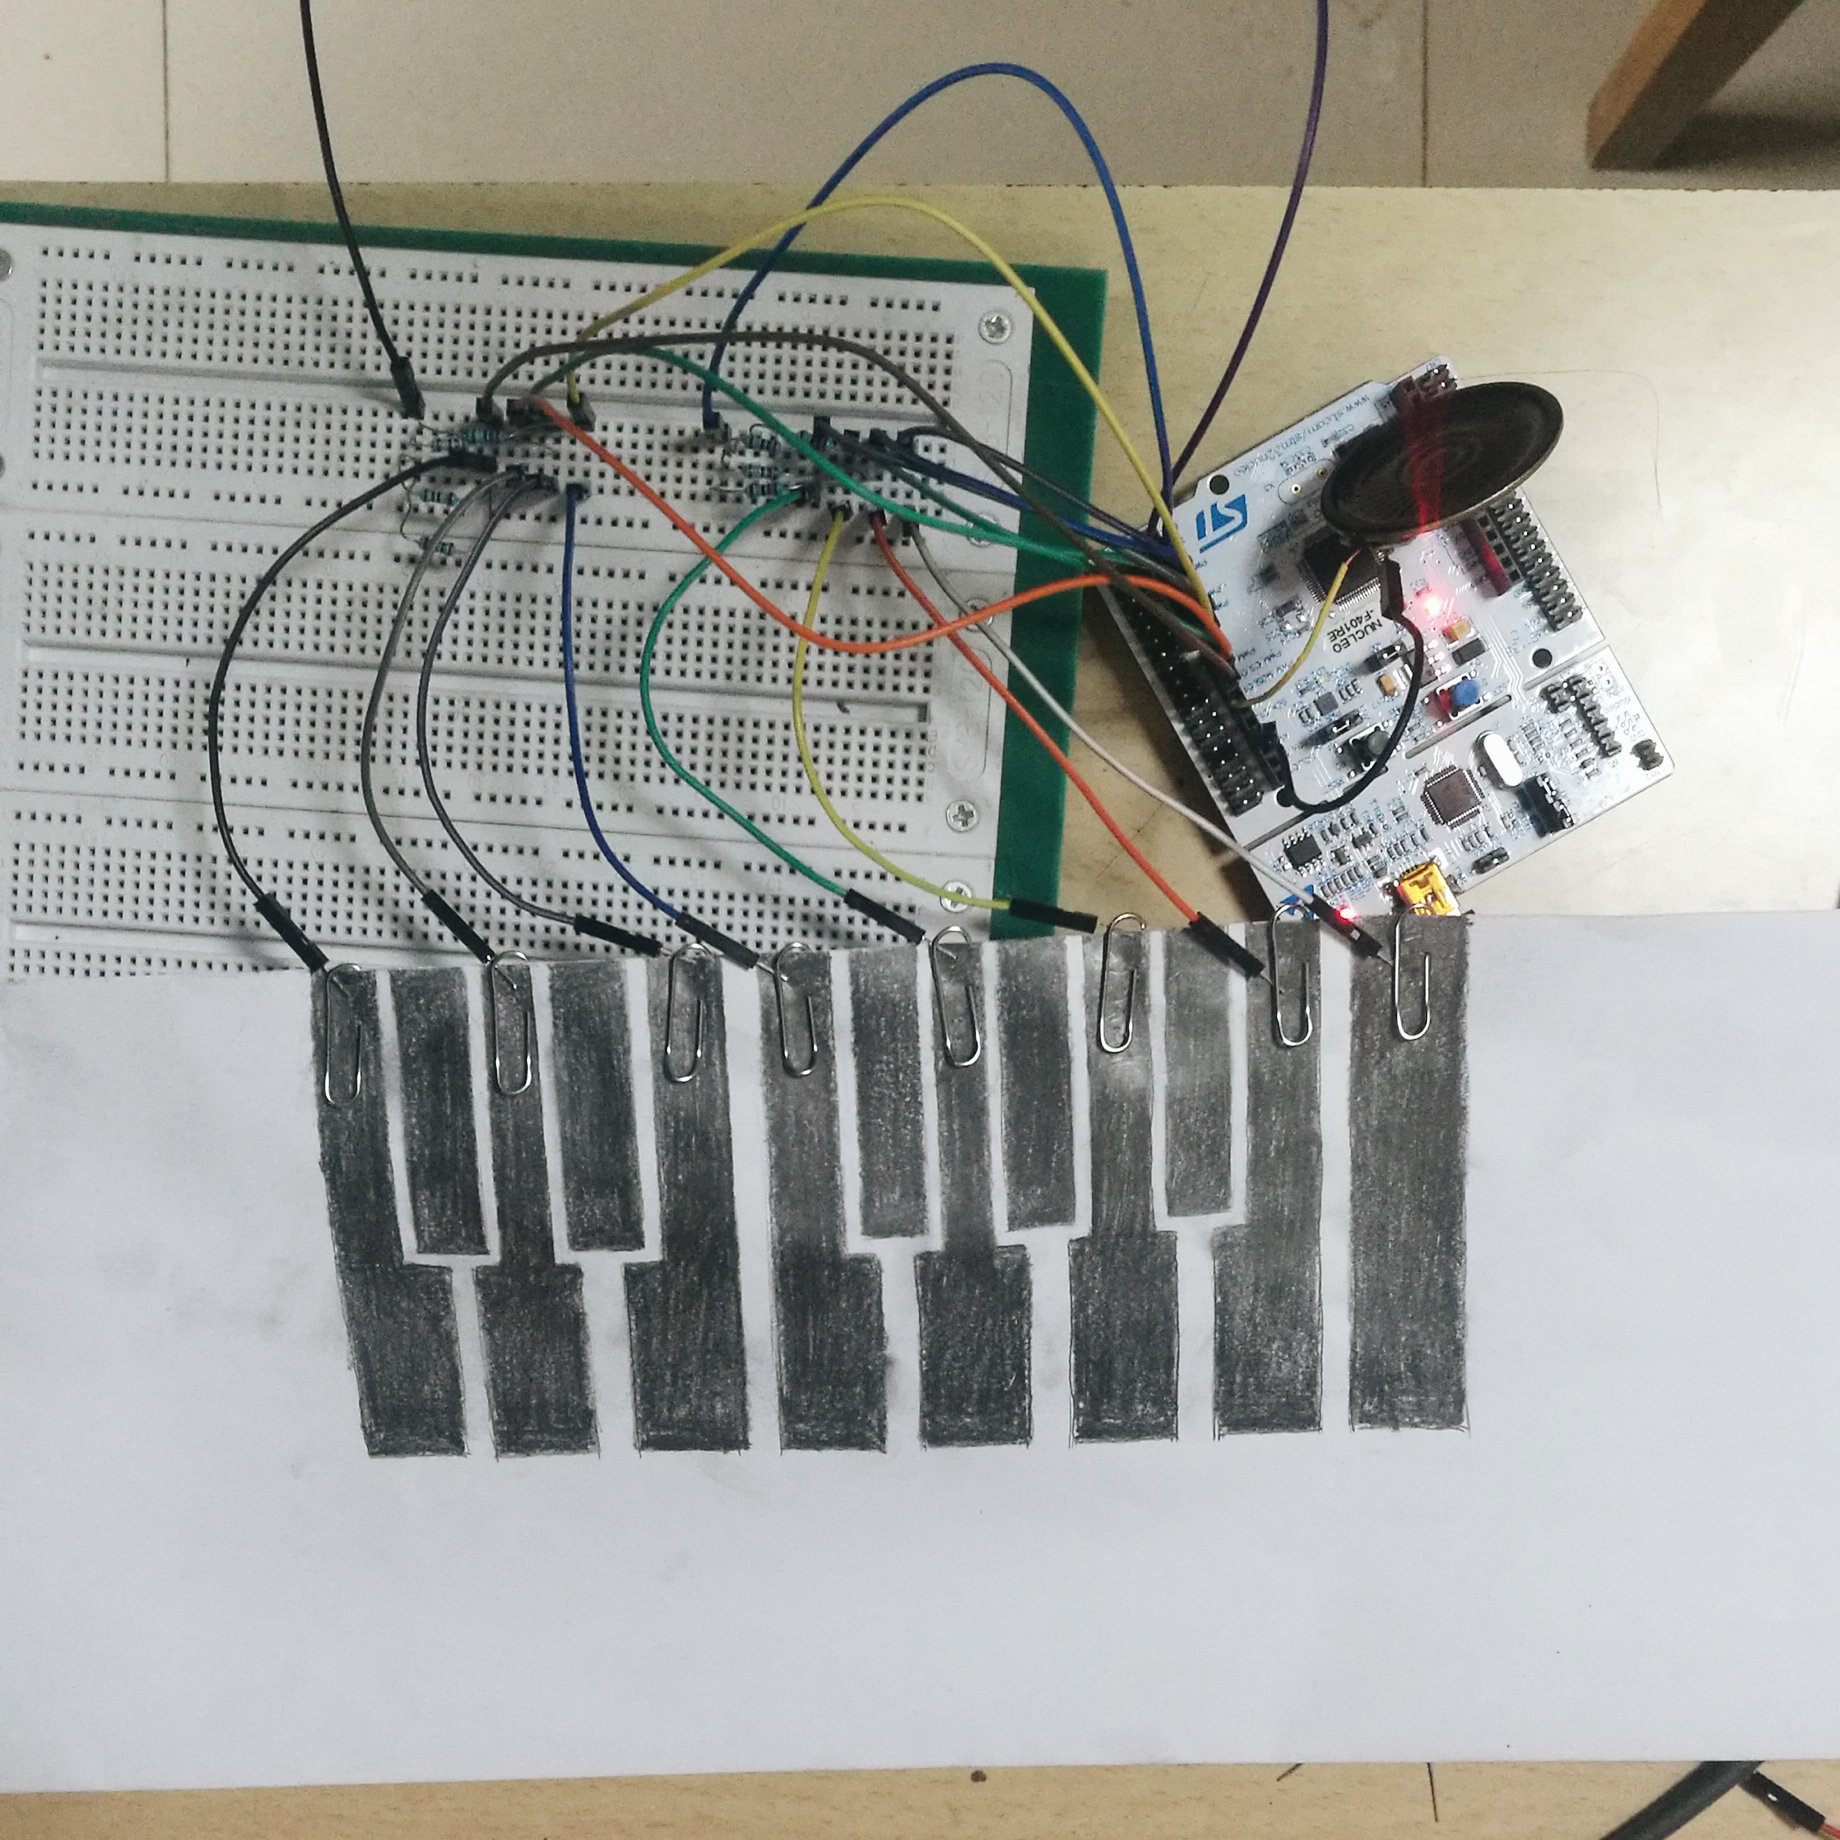
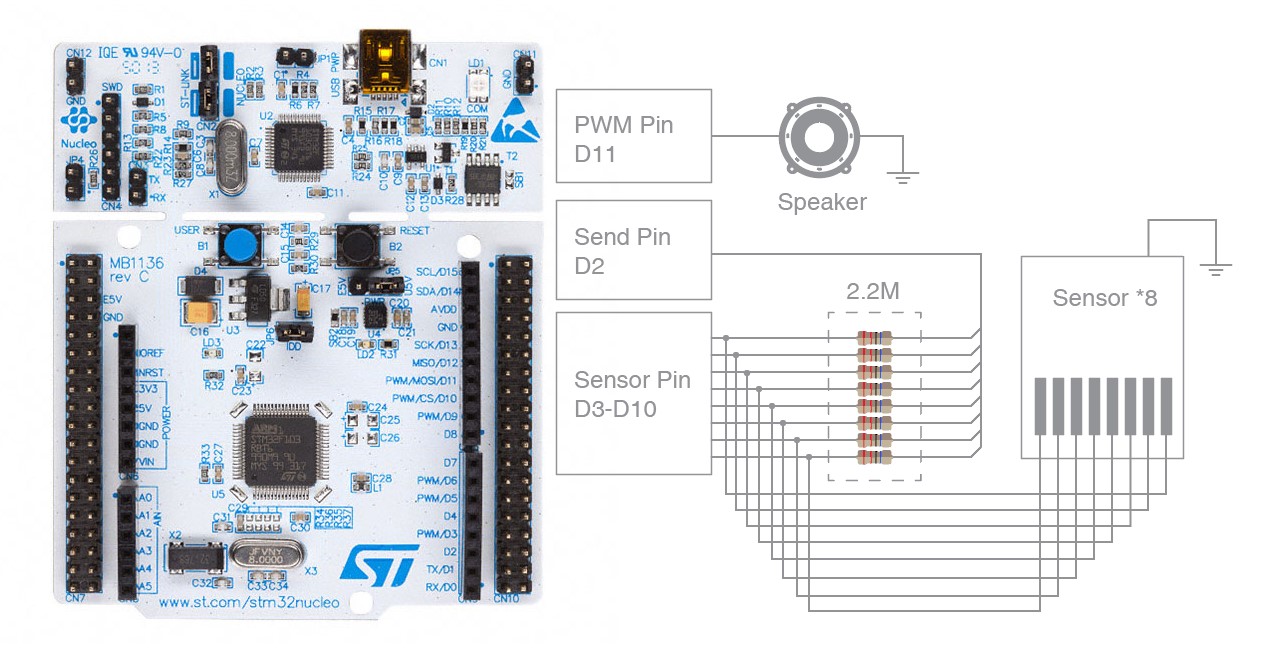 Wiring of the System
2.Generating Tone Signal
The PWM pin of STM32 is used to output the monophonic signal. The pin can be connected to the buzzer or the speaker to send out the monophonic audio signal. The monophonic signal is a pure sinusoidal signal of a single frequency.
PWM, or Pulse Width Modulation, is a very effective technology that USES the digital output of the microprocessor to control the analog circuit. It takes the pulse train with equal pulse width as PWM waveform, and the frequency can be modulated by changing the period of the pulse train, and the voltage can be modulated by changing the pulse width or duty cycle. In this project the duty cycle is set to 50%.
3. Using Arduino IDE to Programme STM32 Boards
Using the Arduino IDE for hardware development is very simple and convenient, the software encapsulates a lot of common methods and functions, making users able to focus on the implementation of ideas, but the resources and performance of Arduino series boards are very limited. In this project, we use STM32 Nucleo F401RE, which originally requires various initialization, clock configuration and other operations in programming, but if we can program STM32 with Arduino IDE, a lot of effort will be saved. At present, enthusiasts have established a community to make STM32 series boards support Arduino IDE: http://stm32duino.com/. The supported boards now cover the STM32F4 series used in this design, which means that we can control our boards through simple configuration, that is, using methods and functions provided by the Arduino community.
Details refer to: https://github.com/stm32duino/Arduino_Core_STM32
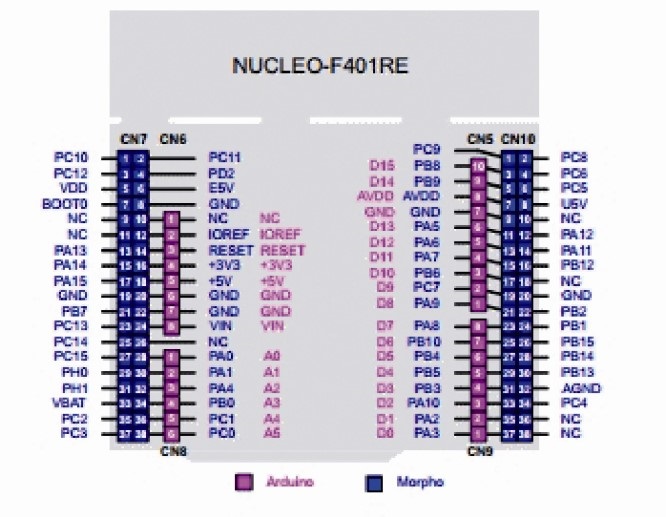
Mapping of the pinouts
Reference
1. Paul Badger. Capacitive Sensing. https://playground.arduino.cc/Main/CapacitiveSensor?from=Main.CapSense .
2. Ikhsan Ismail. Paper Piano with Arduino. https://www.hackster.io/San_Ismail/paper-piano-with-arduino-e27da7 .
3. . Arduino core support for STM32 based boards.
https://github.com/stm32duino/Arduino_Core_STM32 .